

Shopify Custom App Integration
Connect your Shopify store with Outrank using your own custom app
How the Shopify Custom App Integration Works
The Shopify Custom App integration lets you publish Outrank articles directly to your Shopify store's blog using a custom app that you create and own. You stay in full control of the access scopes and credentials, and Outrank uses them to publish content on your behalf.
Setup Instructions
Step 1: Before you start
- You must be the store Owner to complete this setup. Collaborator accounts cannot create custom apps in Shopify.
- Your store needs at least one blog. Create one under Online Store → Blog posts before continuing.
Step 2: Create a custom app
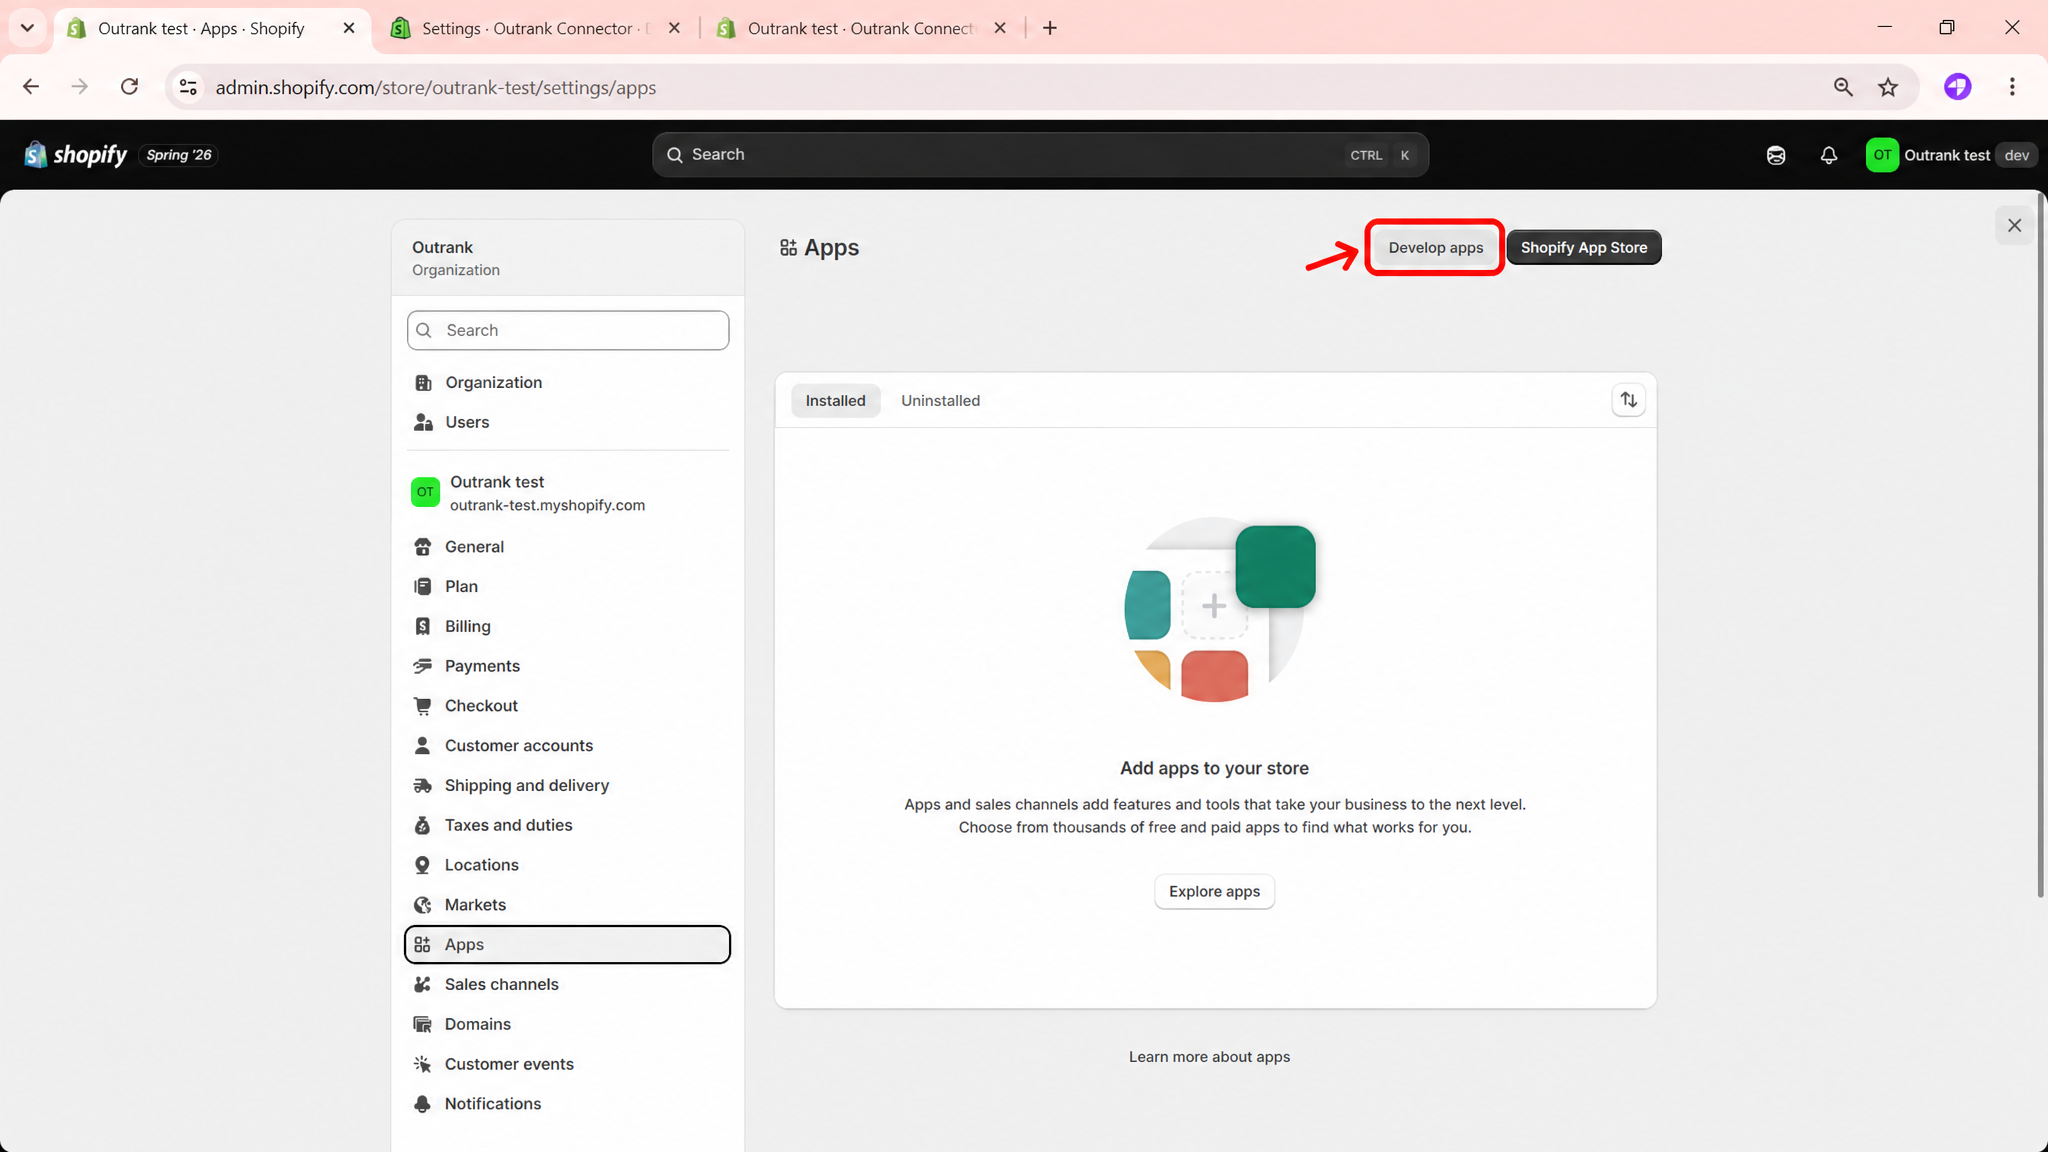
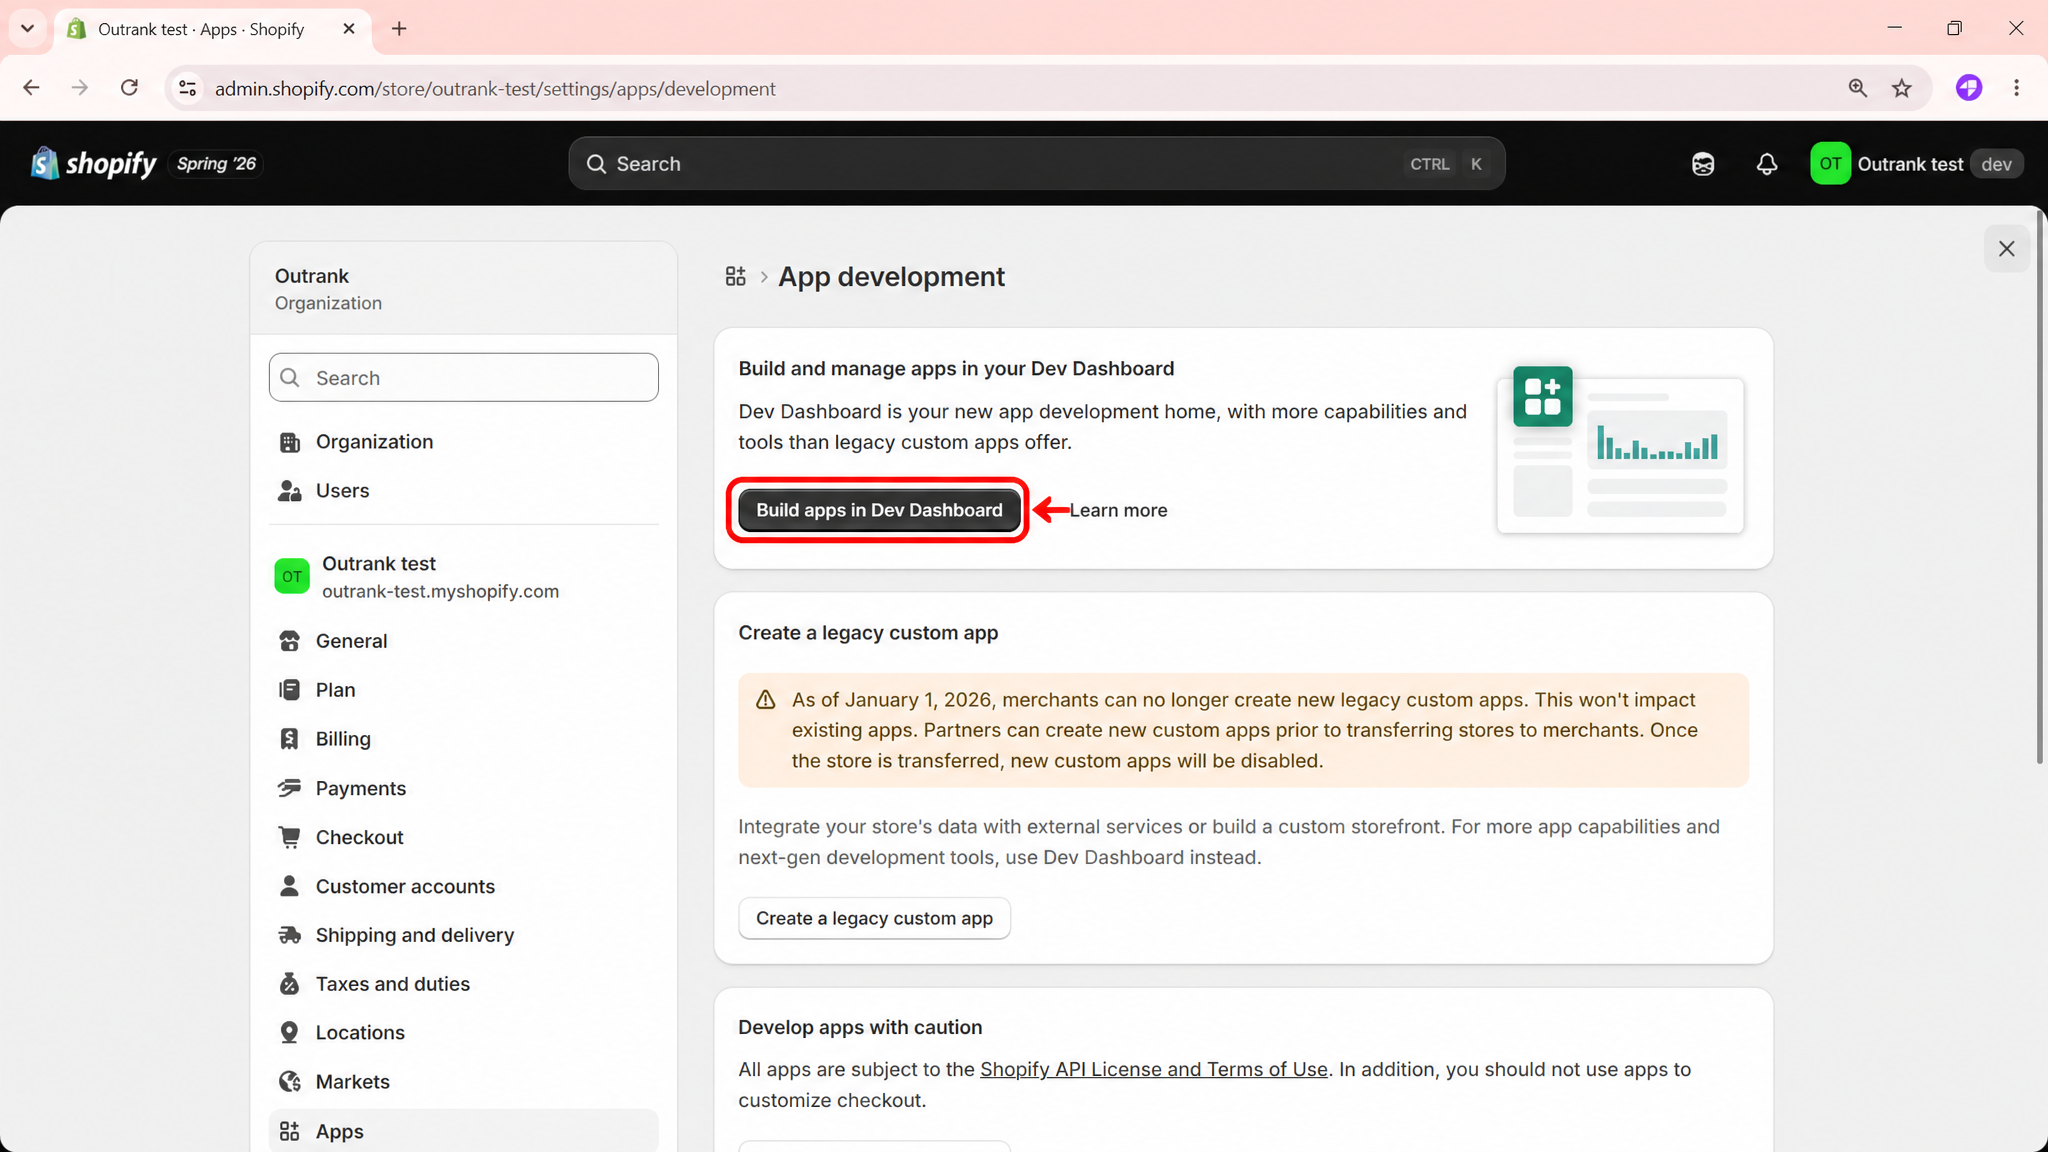
- Go to Settings → Apps → Develop apps, then select Build apps in the Dev Dashboard.
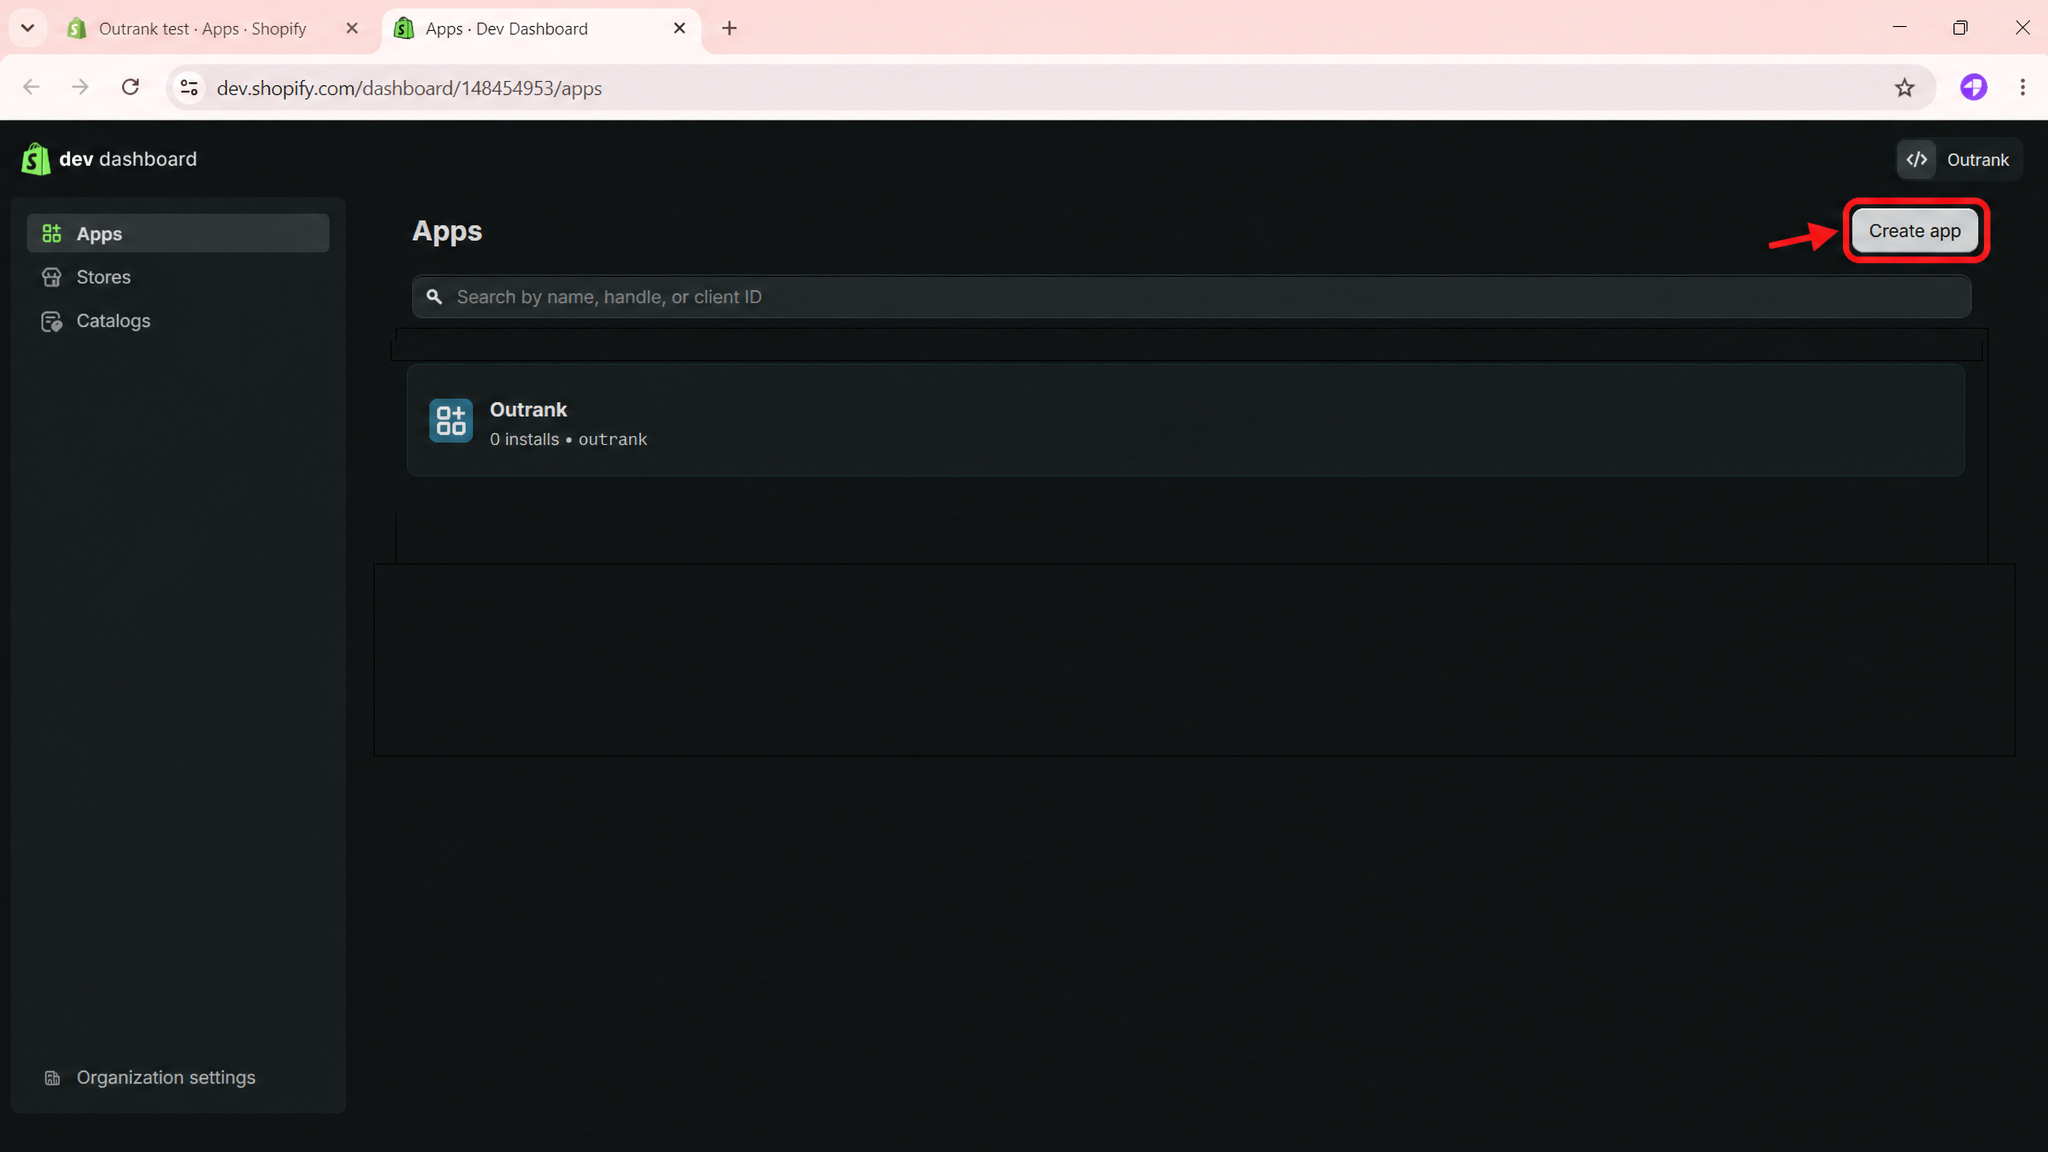
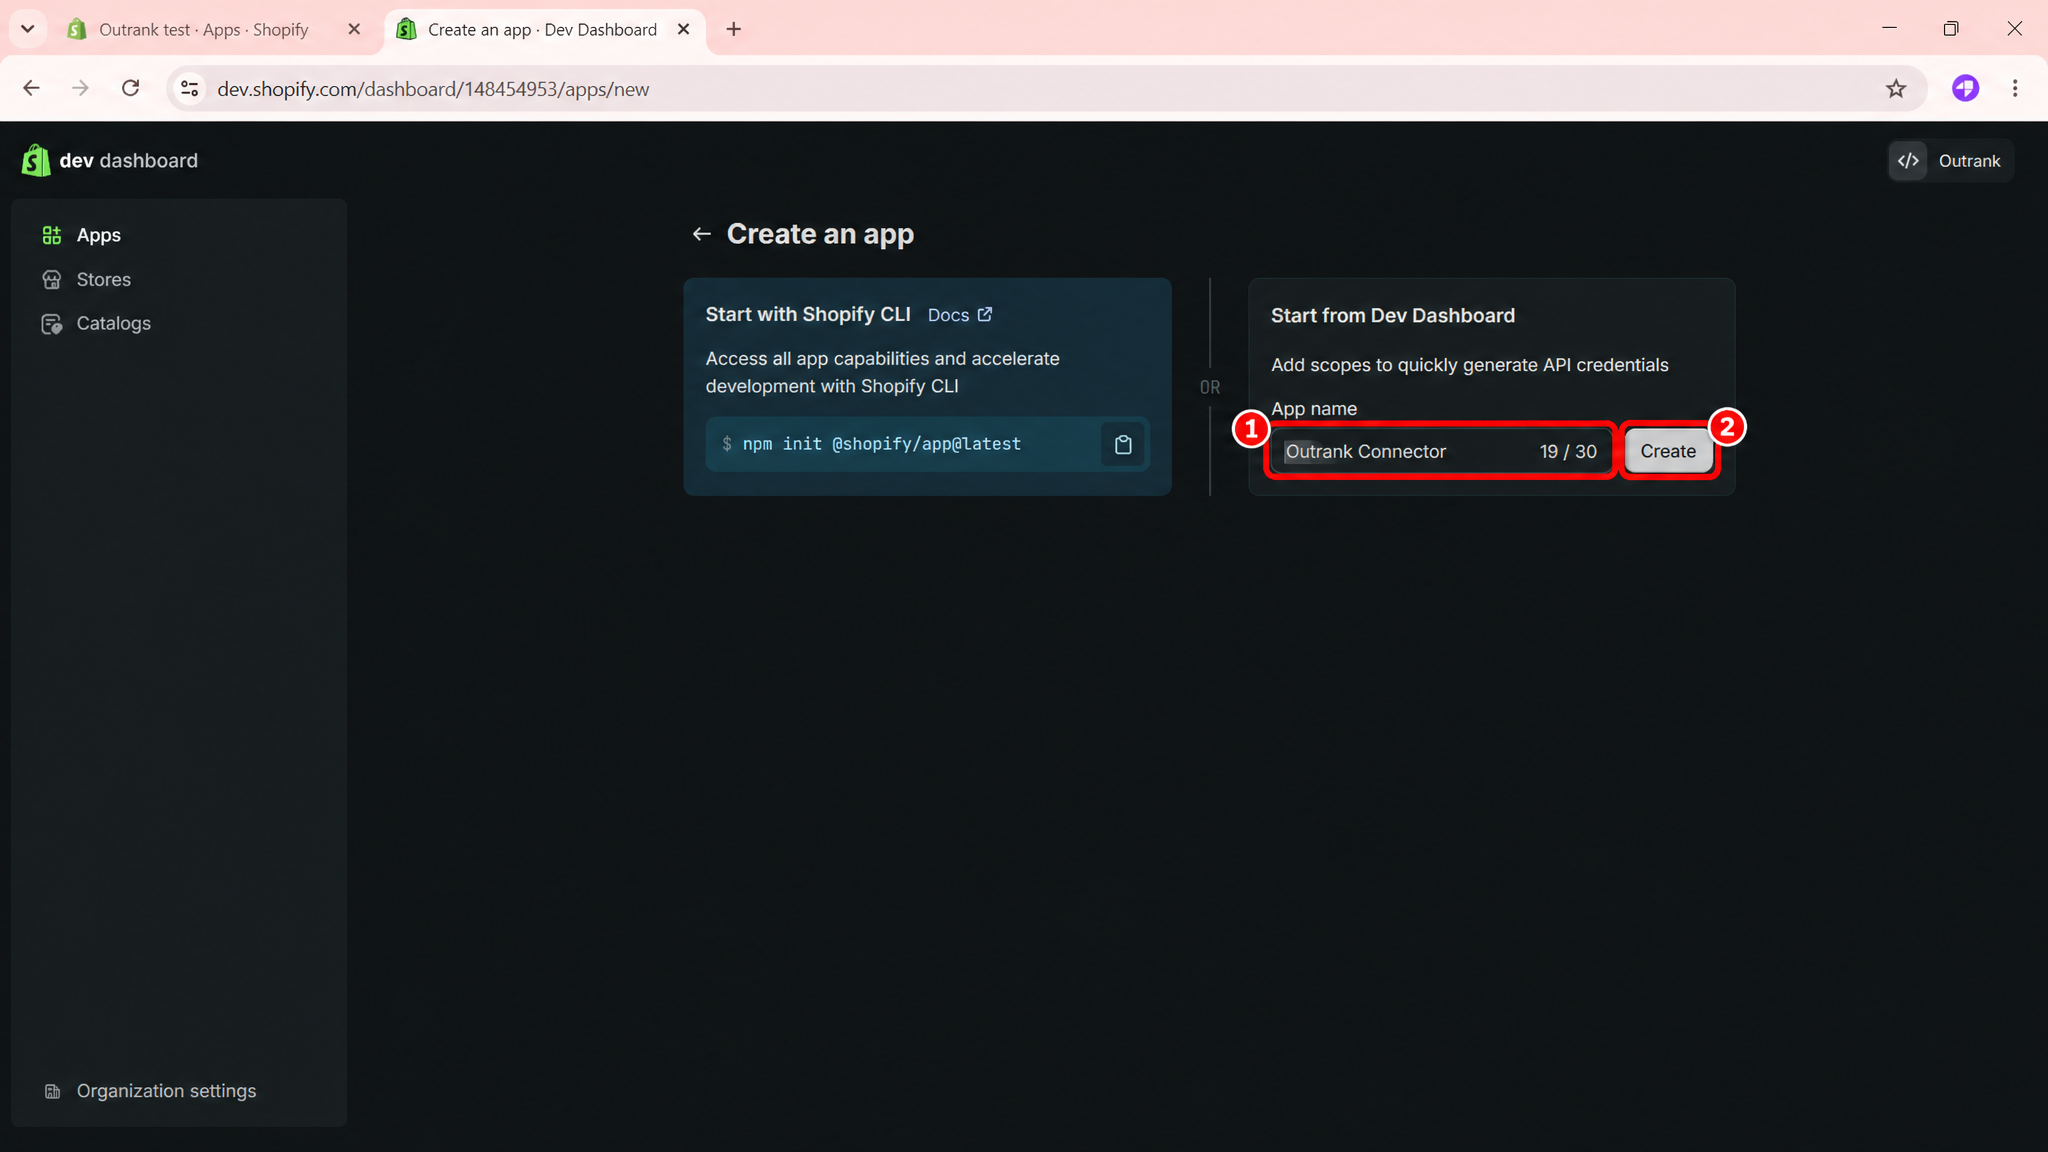
- Choose Create app and give it any name you like (for example, Outrank Connector).
Step 3: Set the access scopes
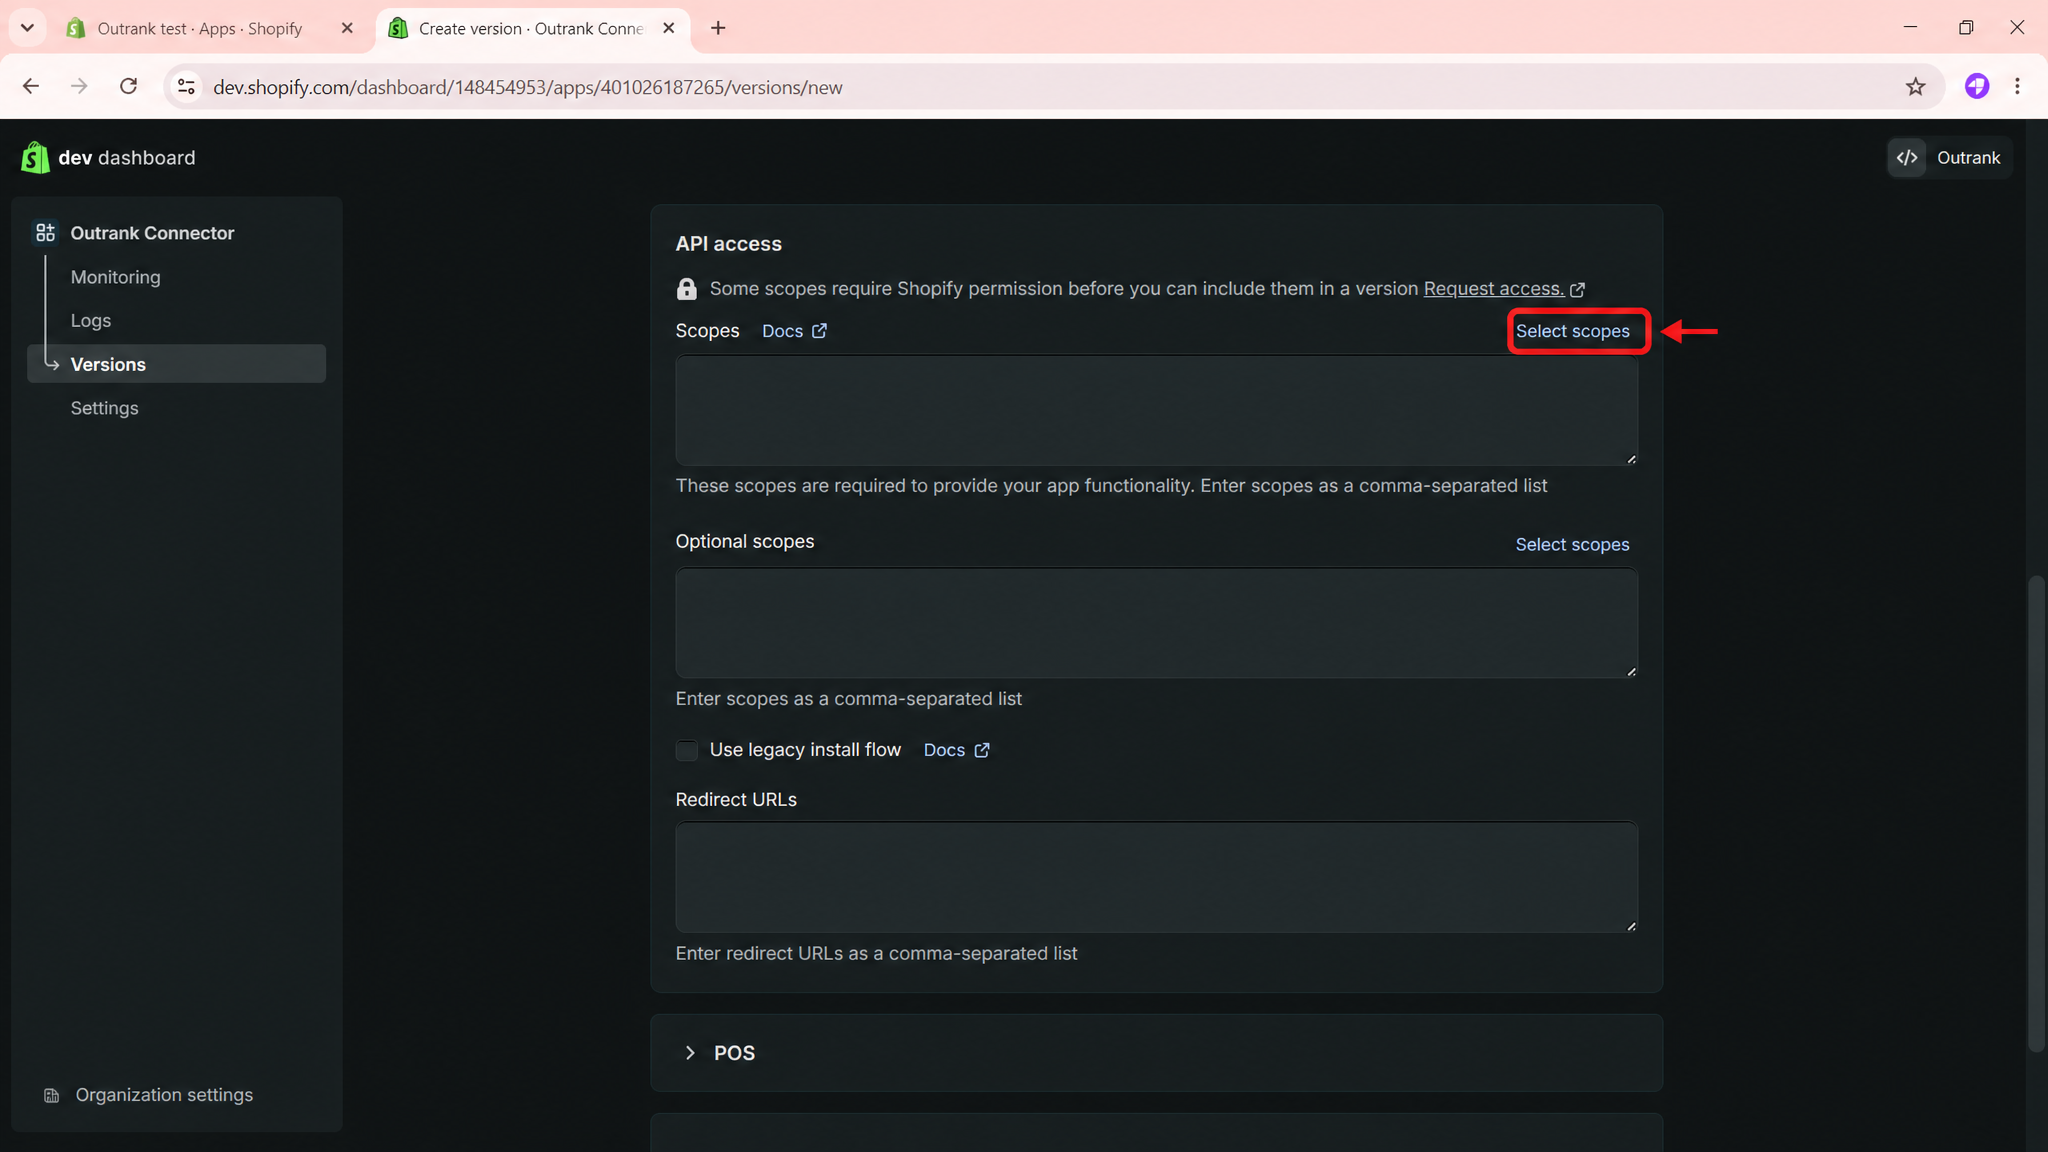
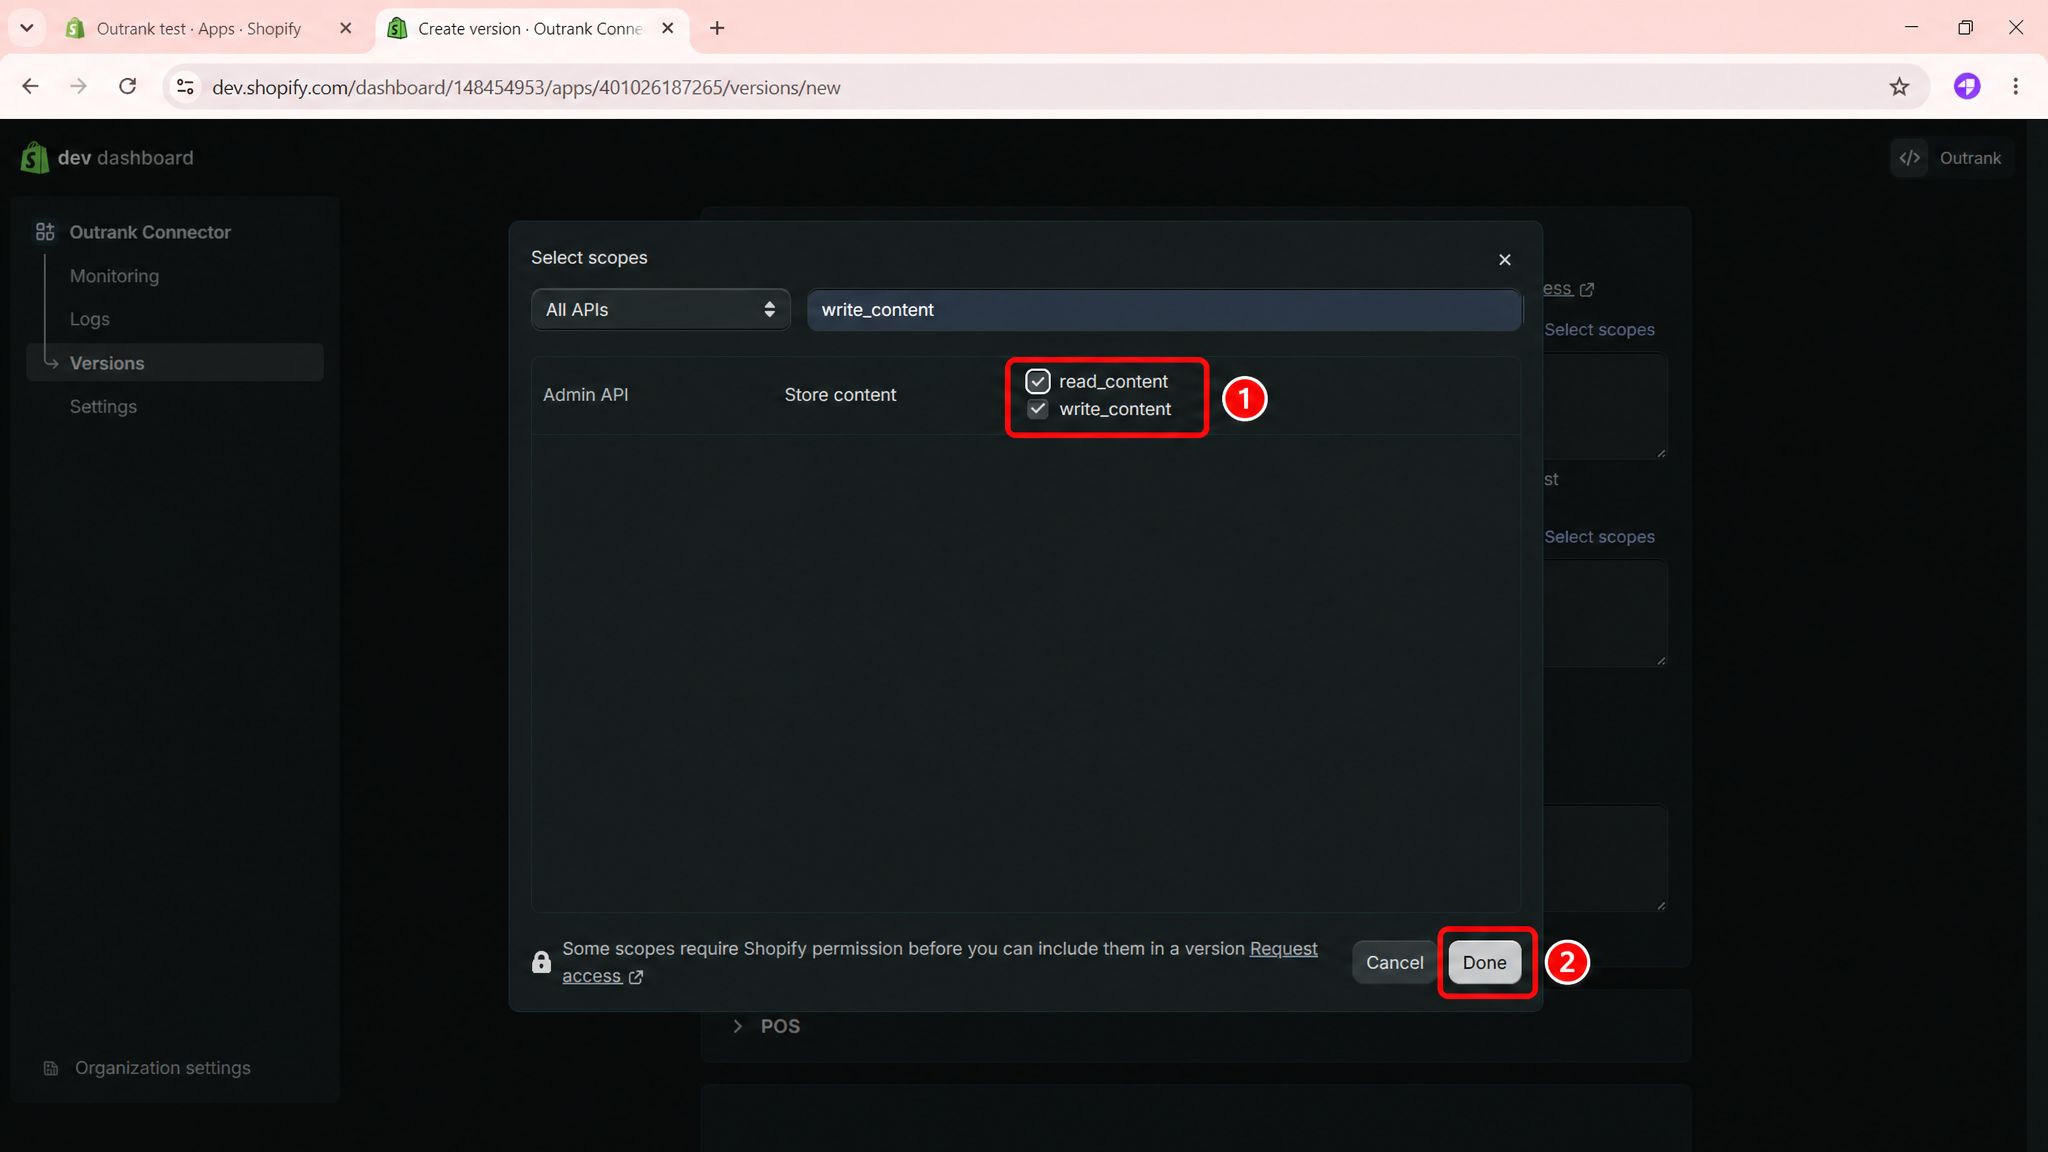
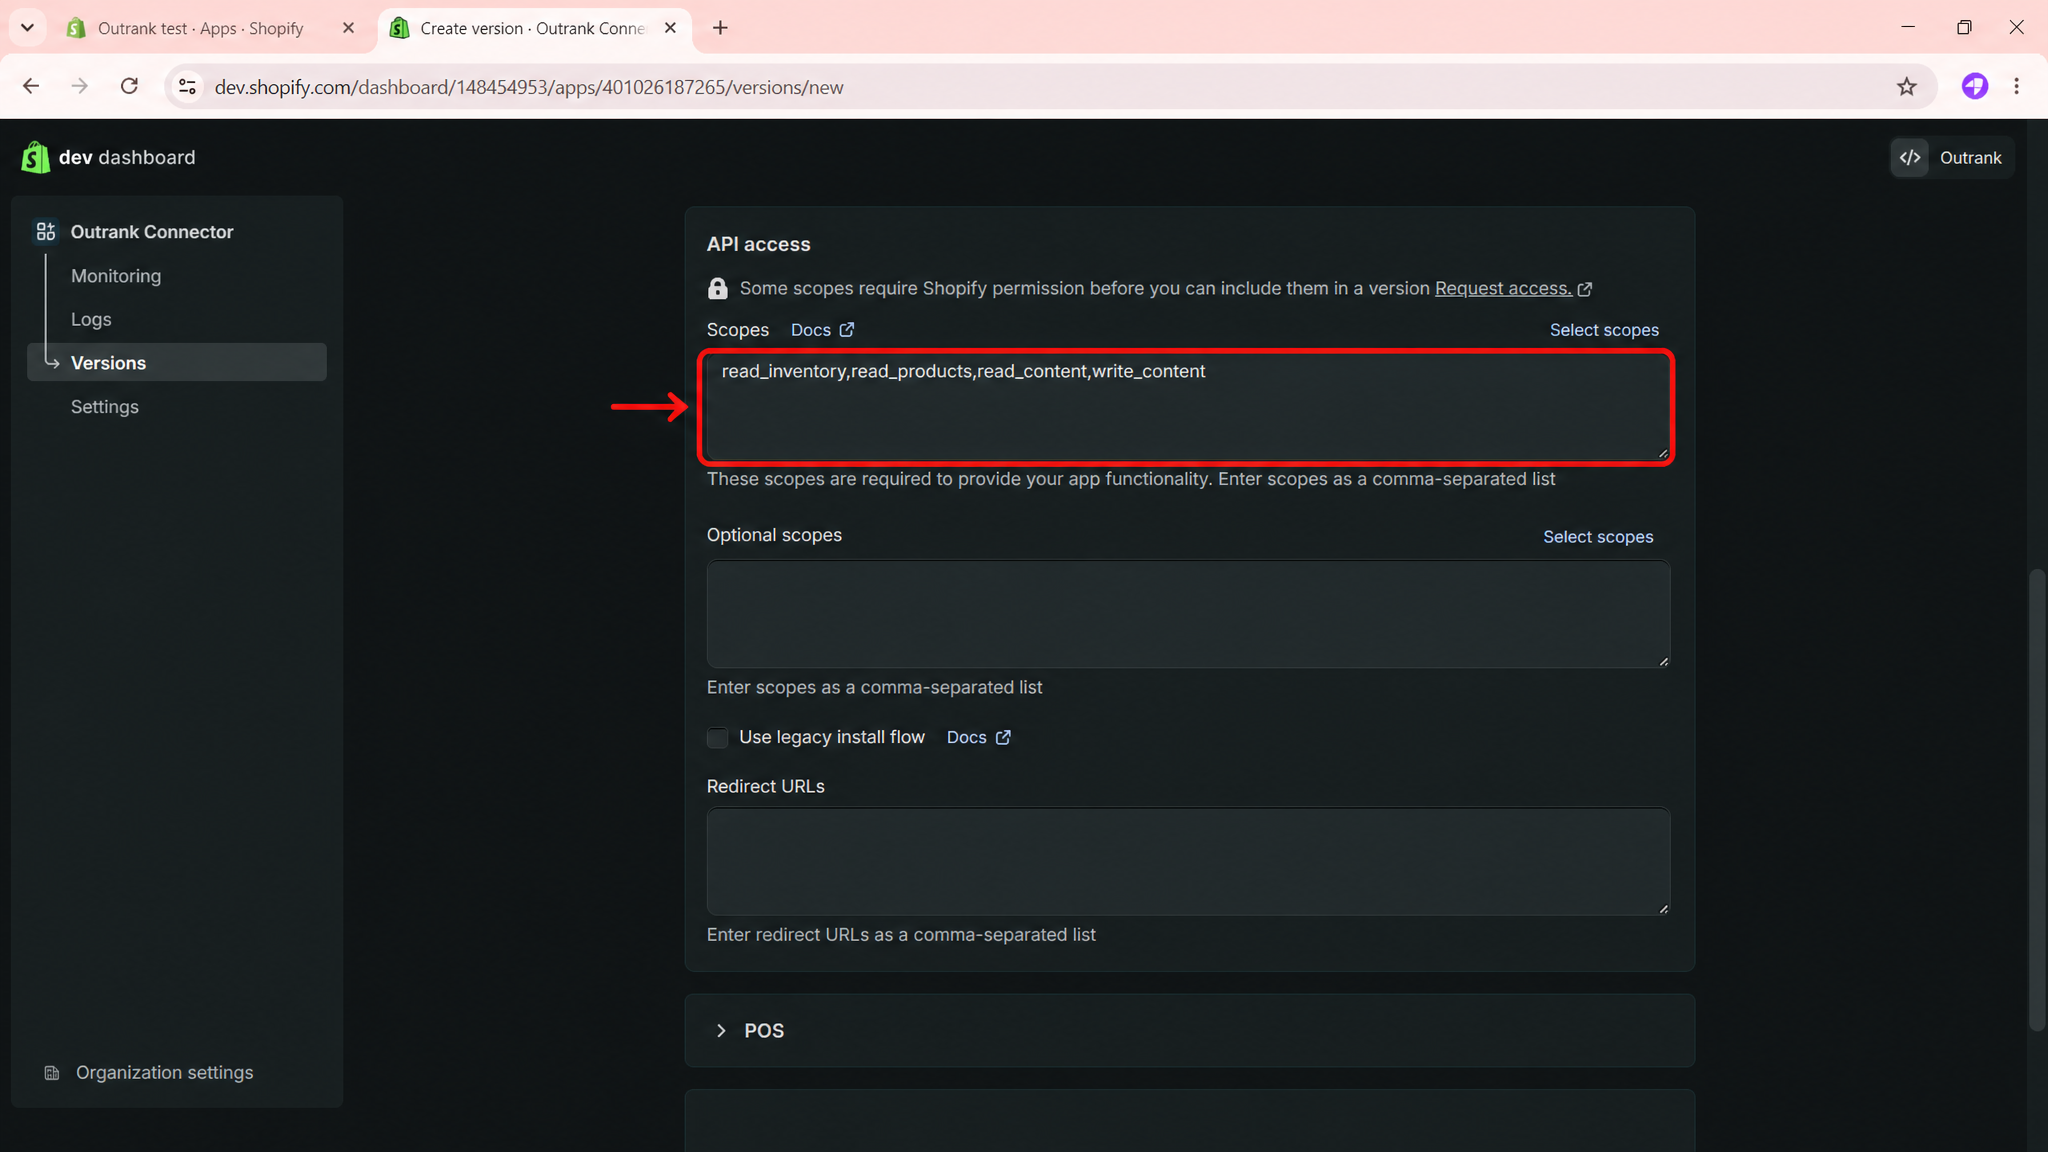
Open your app's Versions tab, find the API access section, choose Select scopes, and enable the following four scopes:
write_contentread_contentread_productsread_inventory
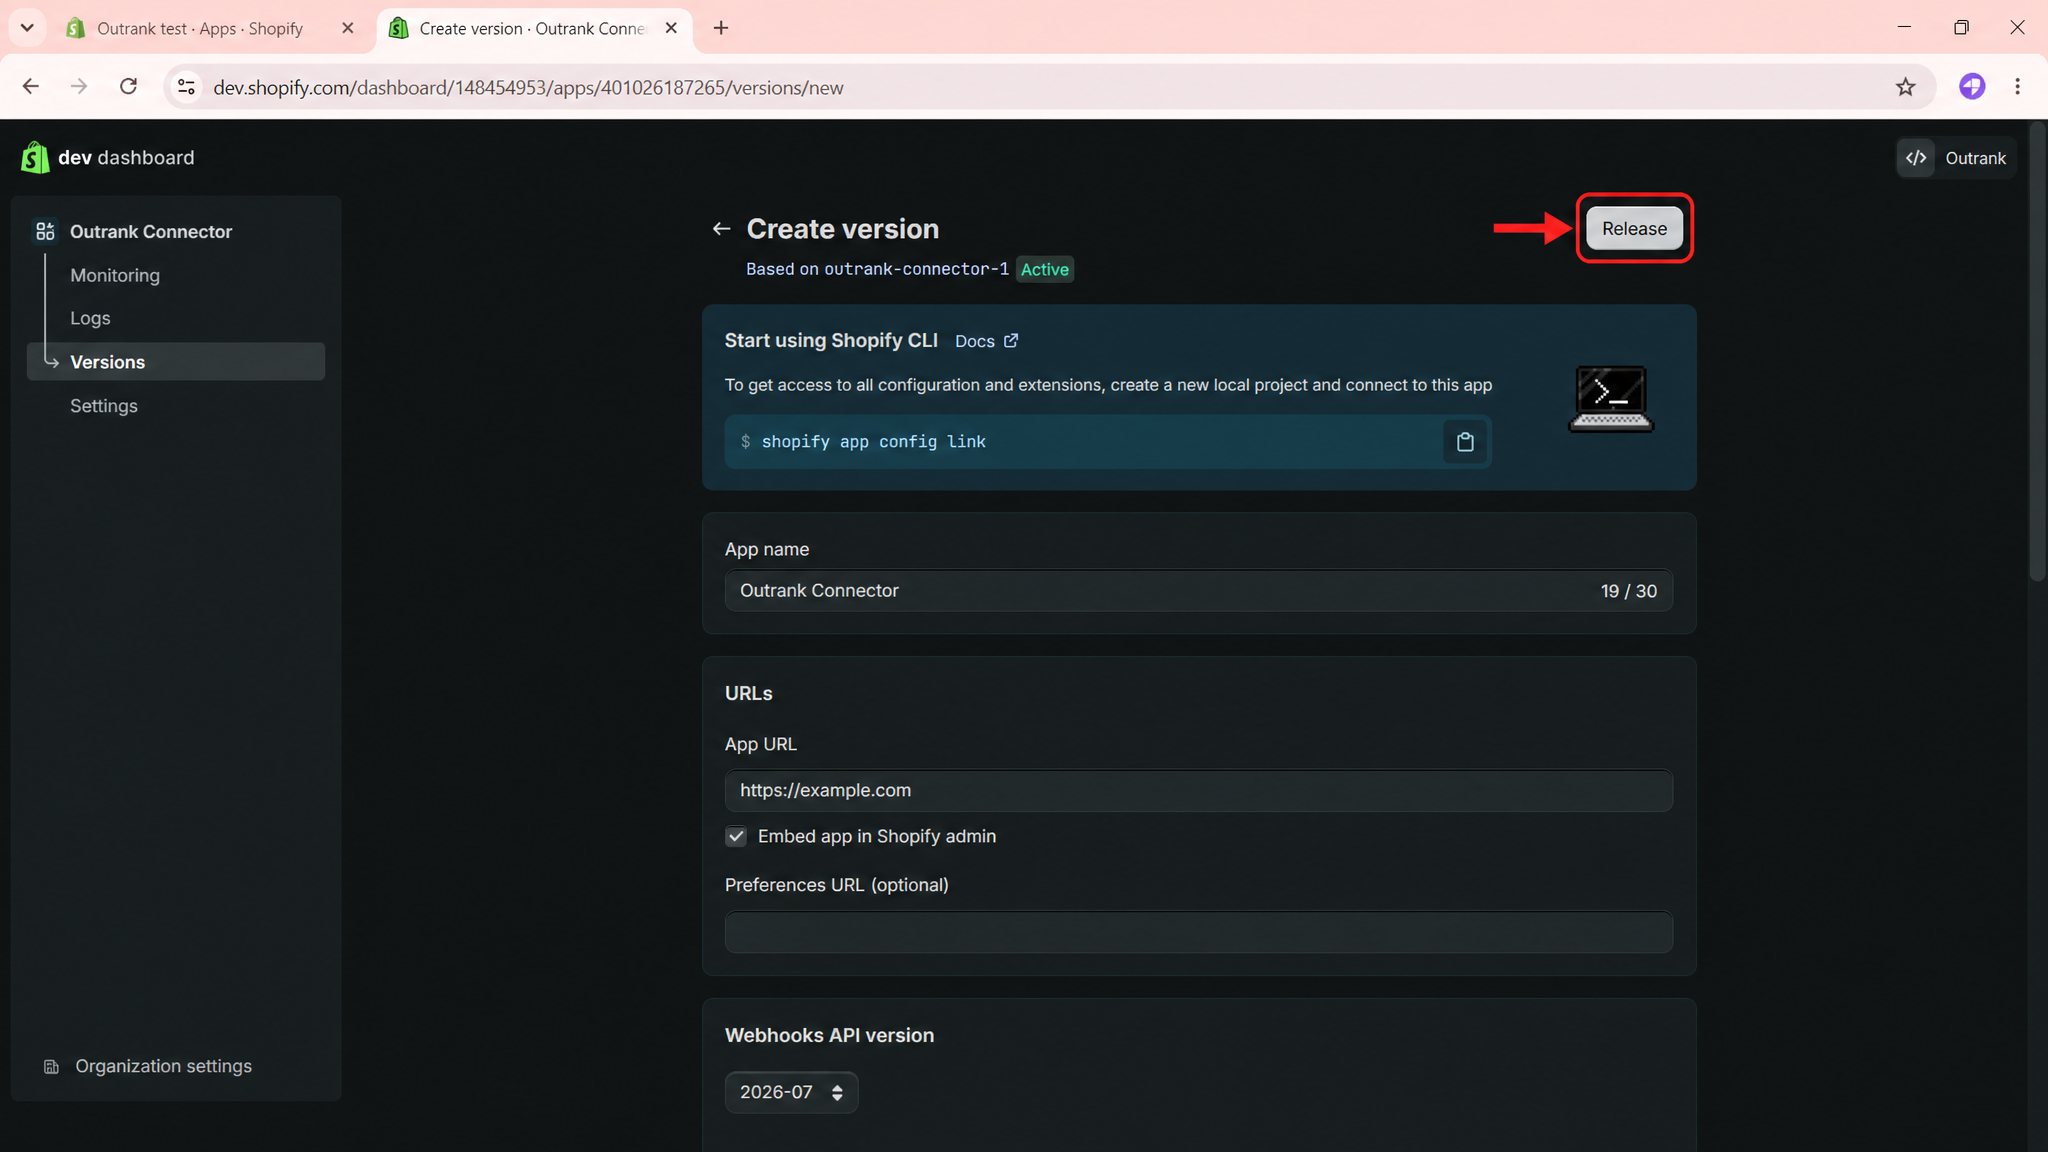
Select Done, then Release to apply the scopes. Changing scopes later requires releasing a new version and reinstalling the app.
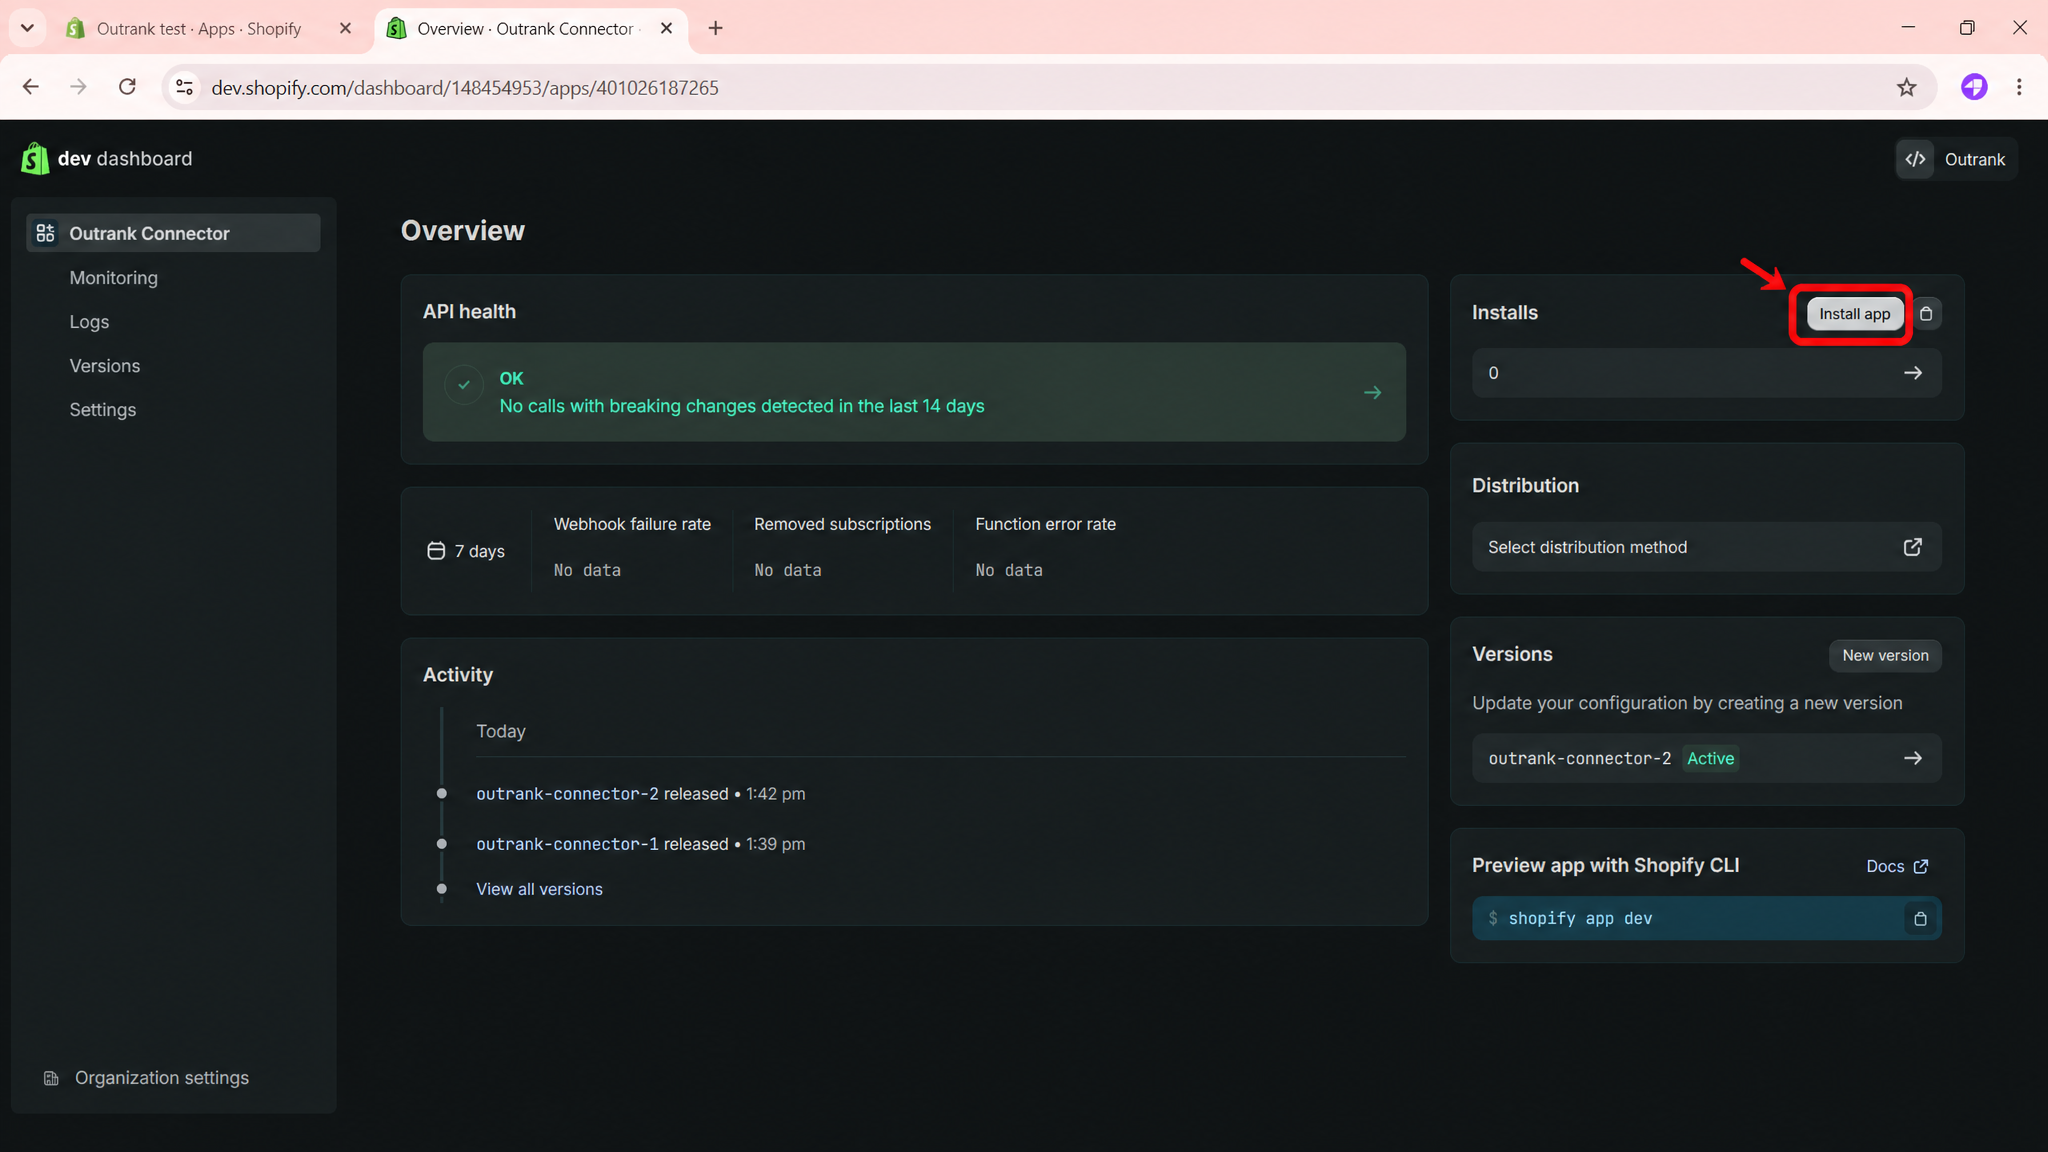
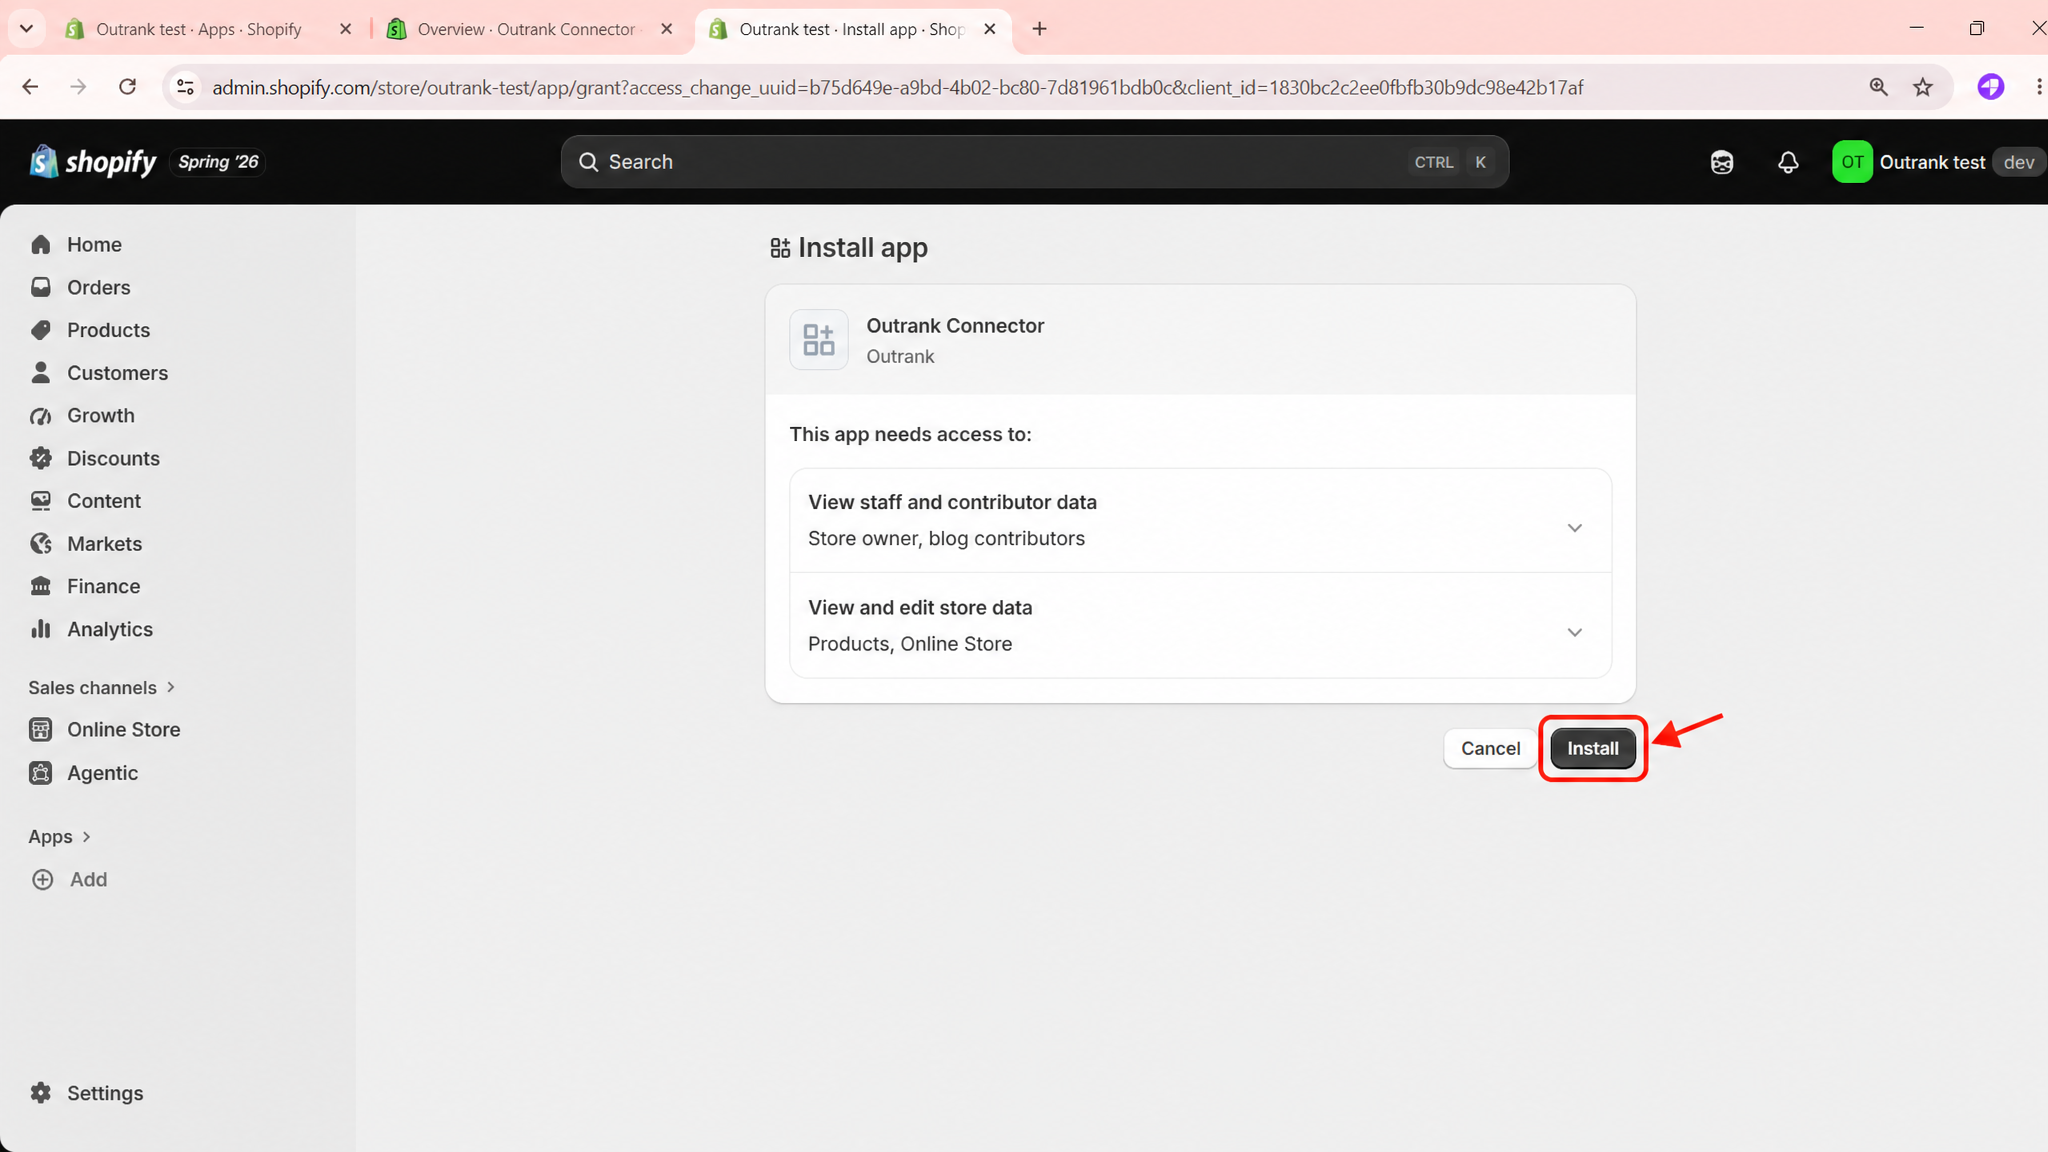
Step 4: Install the app
- From the app overview, choose Install app.
- Select your store and confirm the installation. This grants the app the scopes you enabled.
Step 5: Get your credentials
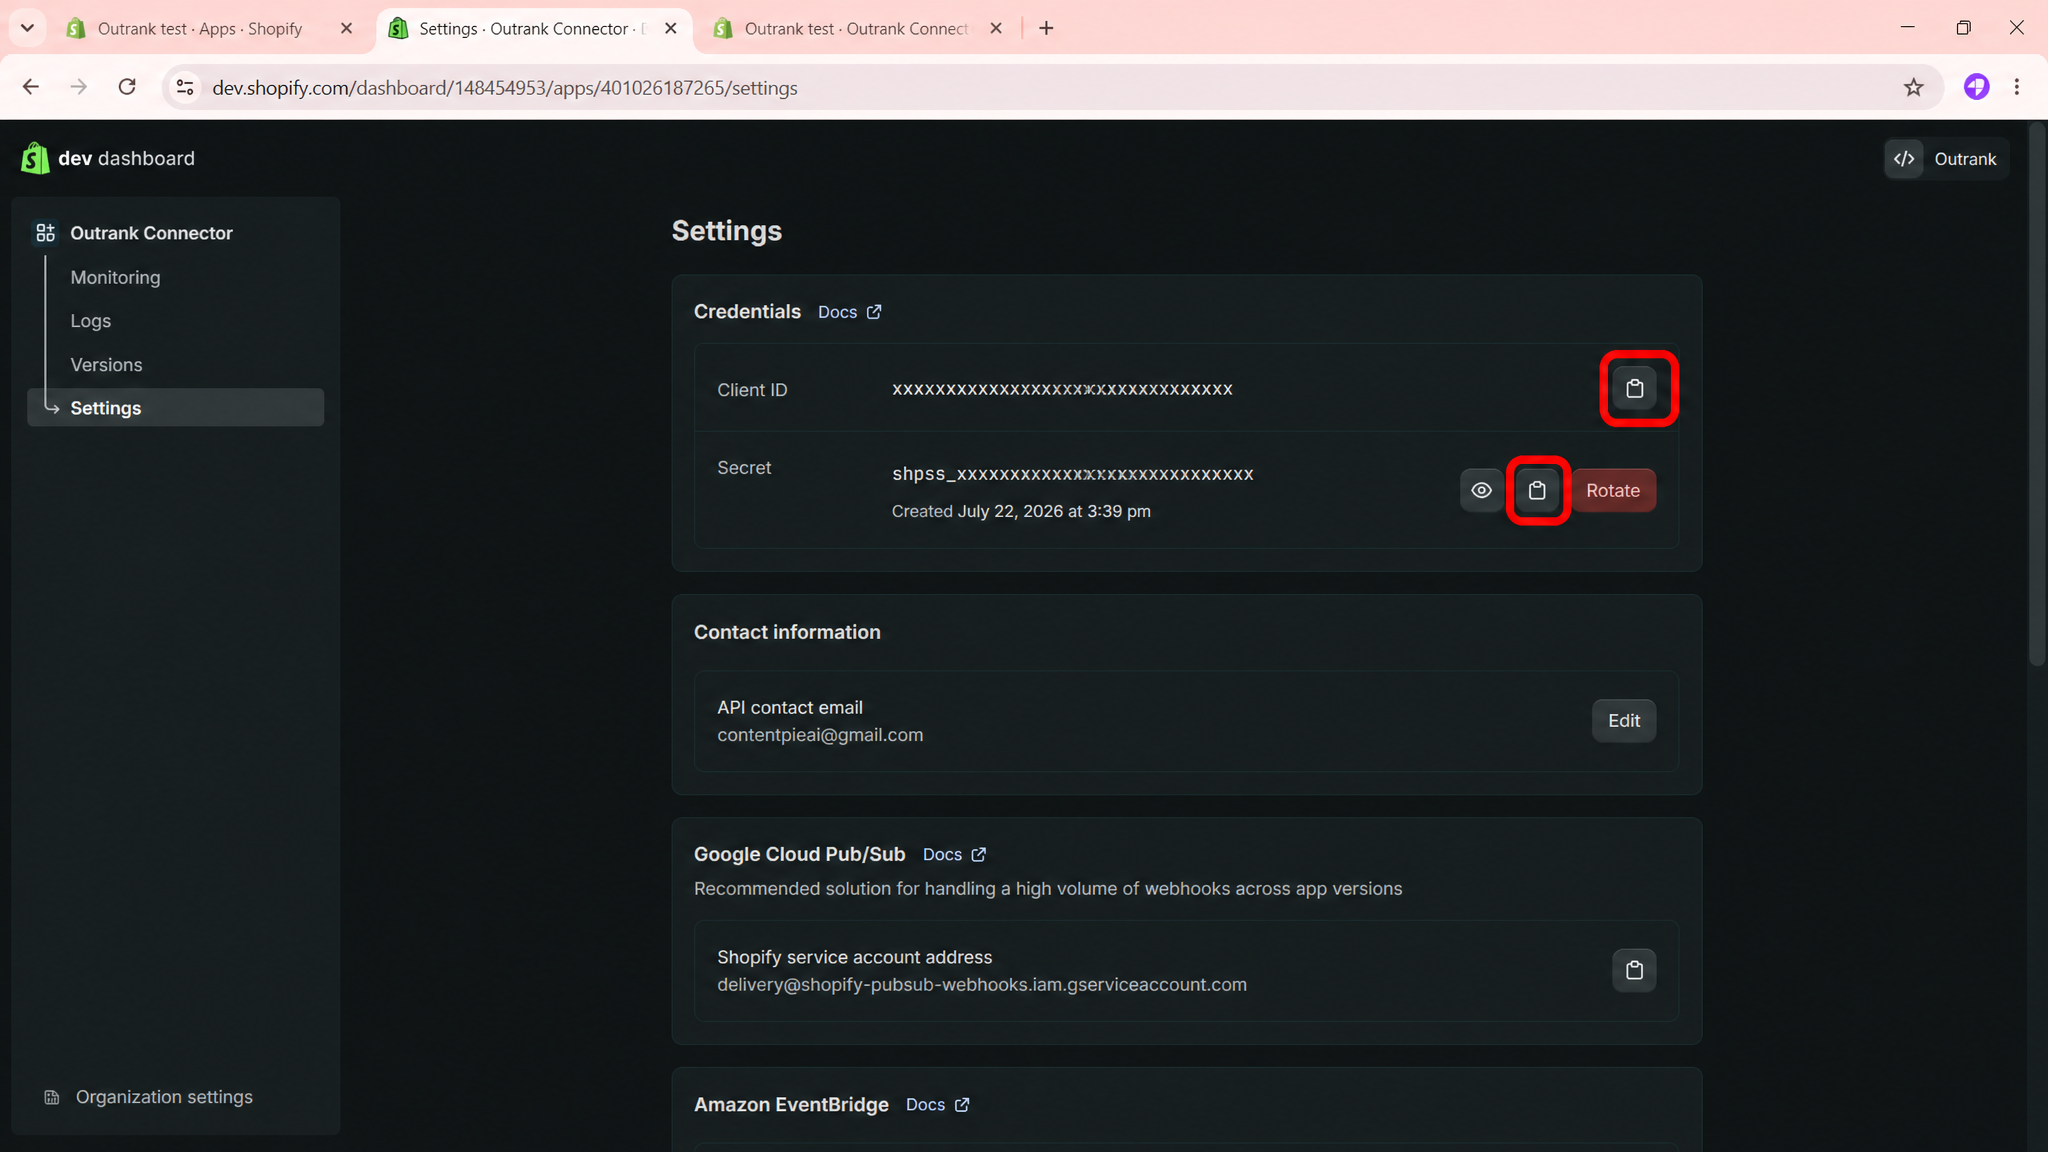
- Open the Settings tab of your custom app.
- Copy the Client ID and Client Secret — you'll paste them into Outrank in step 7.
Step 6: Find your store name
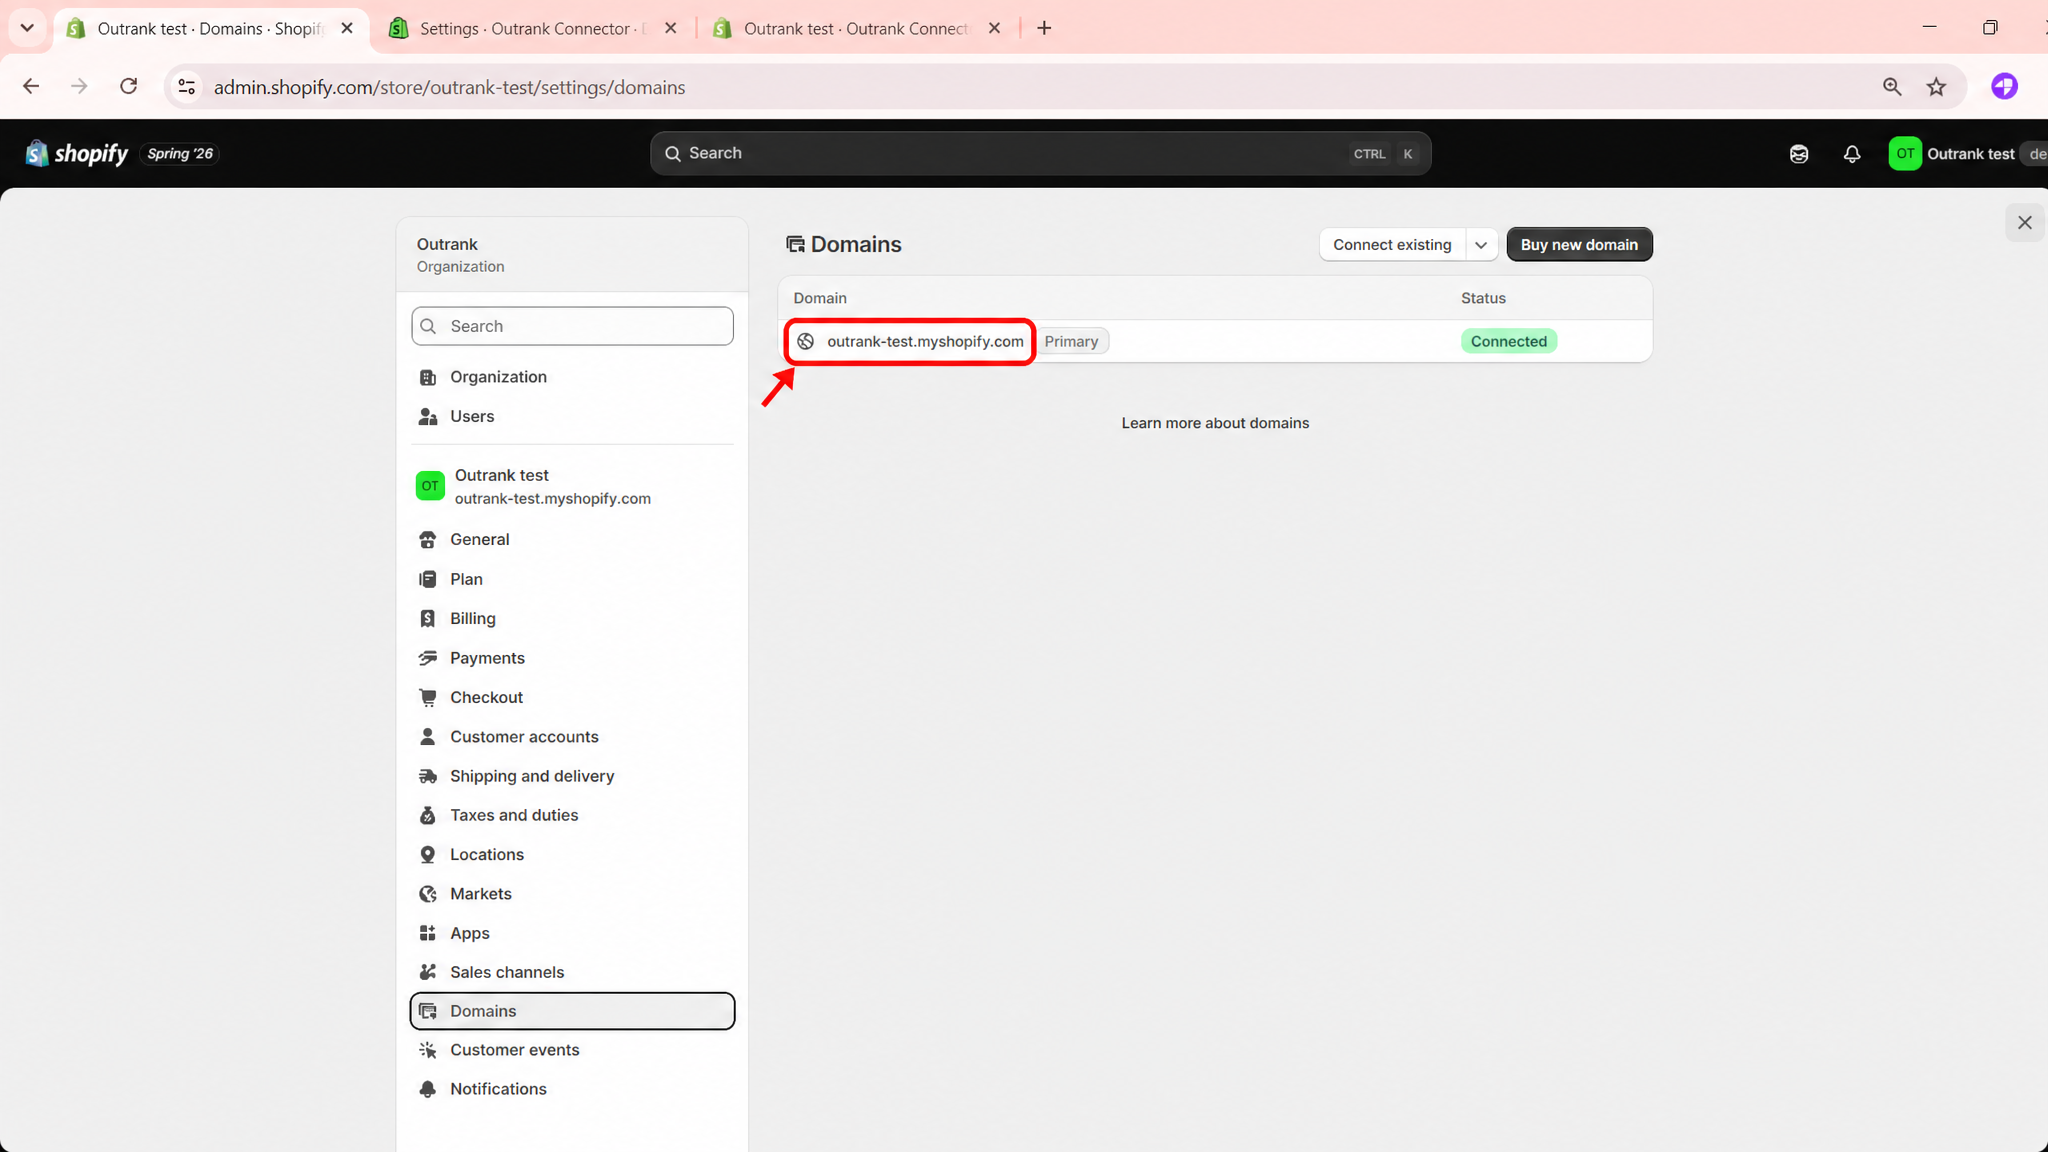
- Open Settings → Domains in your Shopify admin.
- Copy the part of your
.myshopify.comaddress that comes before.myshopify.com. Inoutrank-test.myshopify.comyour store name isoutrank-test.
Step 7: Connect your store
- In Outrank, go to Integrations → New Integration and select Shopify (Custom App).
- Enter your store name (step 6), then paste the Client ID and Client Secret (step 5). Outrank verifies the connection and loads your blogs.
Step 8: Choose your publishing settings
- Give the integration a name.
- Select the blog Outrank should publish articles to.
- Enter the author name for your articles.
- Choose whether to publish immediately or save articles as drafts.
- Click Create integration to finish.
What Gets Published
- Article title
- Article content (formatted in HTML)
- Featured image
- Meta description
- Publication status (published or draft)
Troubleshooting
Store not found
Enter only the store name, without .myshopify.com. Double-check it under Settings → Domains.
Invalid Client ID or Client Secret
Re-copy both values from your custom app's API credentials tab. Make sure there are no extra spaces.
App not installed
The custom app must be installed on your store. Return to the app overview and choose Install app, then try again.
Missing scopes
Enable all four scopes on the Access tab, Release a new version, then reinstall the app before reconnecting.
No blogs found
Create a blog under Online Store → Blog posts → Manage blogs, then reconnect.